

Thesis Submission Approval Form Instructions
Digital IDs (E-Signatures) in Adobe Acrobat for Thesis Submission Approval Form
Download the PDF
- To create a digital ID, the form must be downloaded from the forms section of the graduate college website. All thesis and comprehensive exam forms can be accessed at https://www.gradcollege.txstate.edu/forms.html.
- Open and/or save the form as an Adobe Acrobat PDF. Save with this format: LastnameDocumentTitle
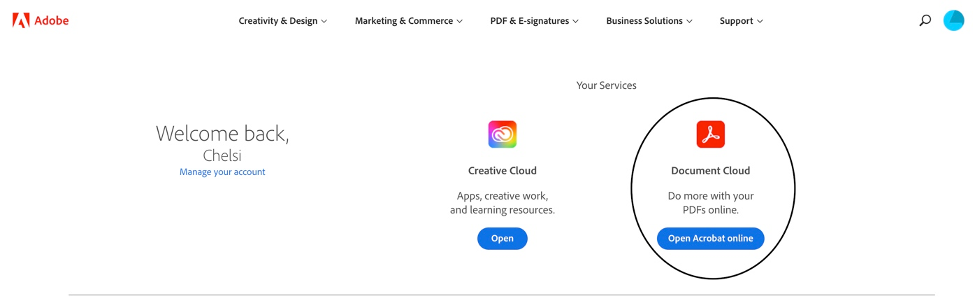
- Open Adobe Cloud via the Texas State DOIT Services portal and login with your Texas State ID. Select the Document Cloud option. DOIT Services portal can be accessed at https://doit.txstate.edu/services/adobecreativecloud.html
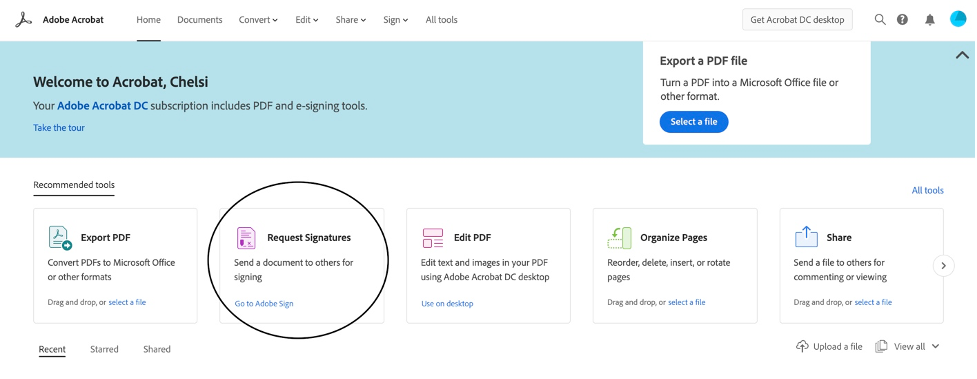
3. Once on the Adobe Acrobat DC homepage, find the “Request Signatures” option and click on it.
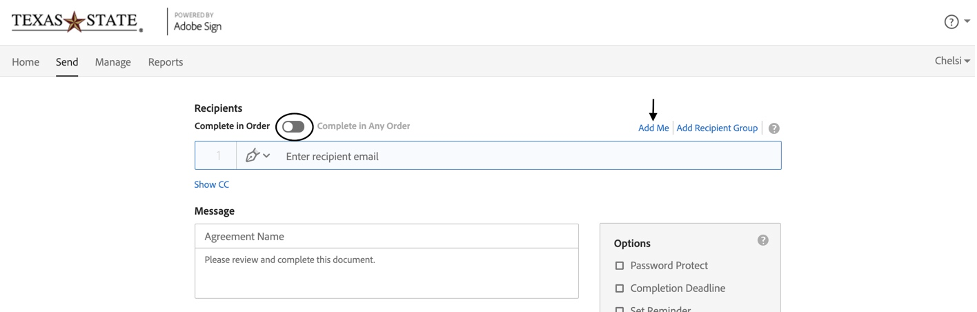
4. Make sure that the toggle under “Recipients” is set to “Complete in Order,” and then click on “Add Me” at the top right corner of the section.
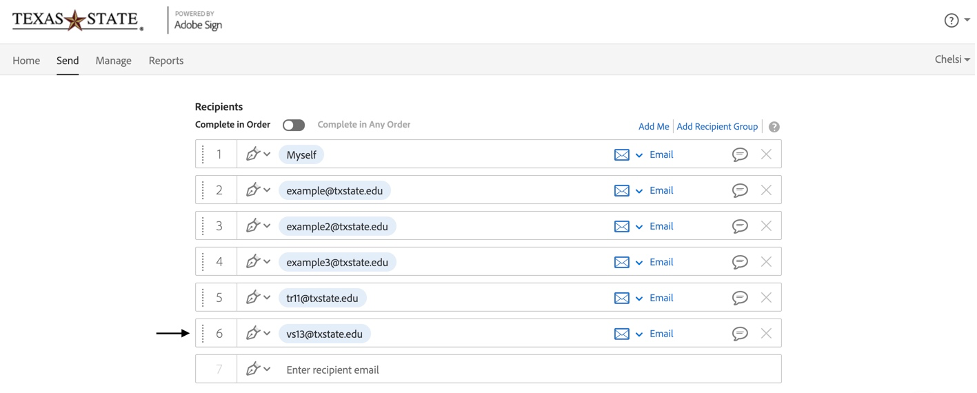
Add your signers in the next fields in the following order, your Chair, your Readers, Dr. Rosenberg, Dr. Smith, GCDEGSPCL@txstate.edu. *Enter ALL EMAILS using this format: NETID@txstate.edu. Please do not use their email alias. If you don’t know the net id, you can ask the person or search their name on the Texas State website. Click on the name in the People box to the right to get complete information, including net id.
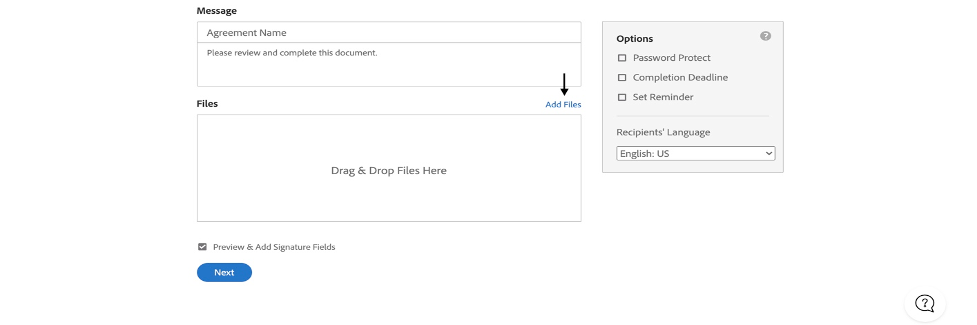
5. Move to the “Files” Section, select “Add Files,” and upload your PDF before clicking “Next”
6. Do not attempt to fill out the information sections yet. Right or double click on the student signature section and select edit.
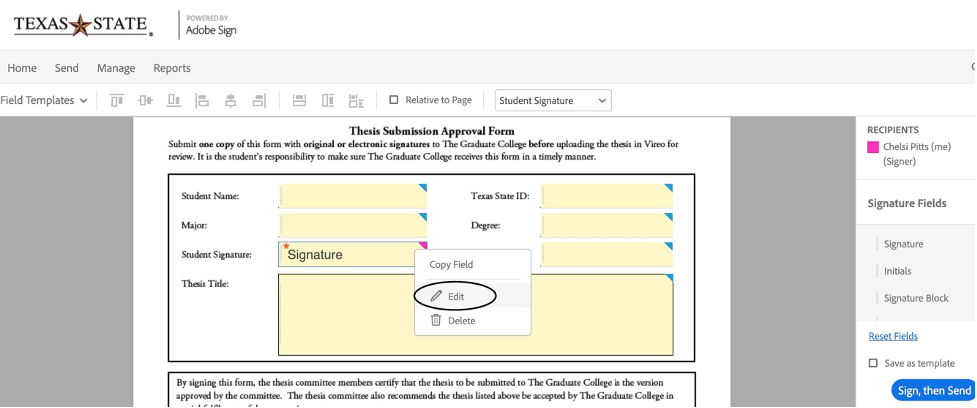
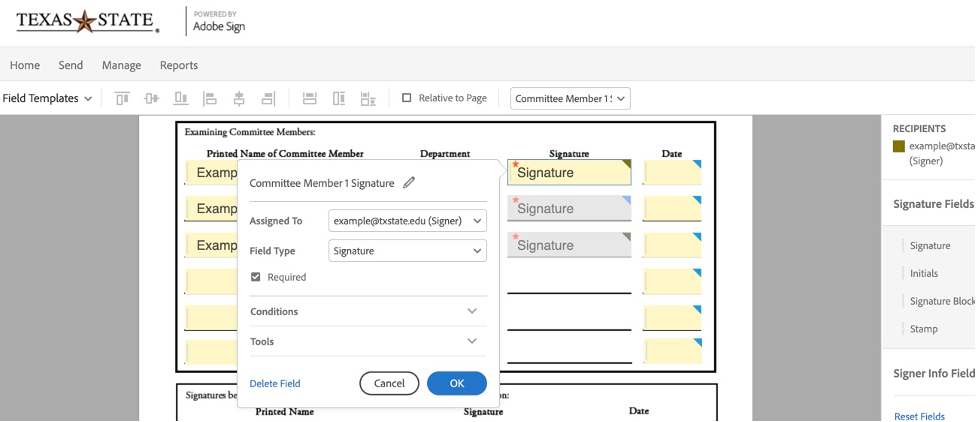
7. Use the “Assigned To” drop down menu to assign the signature slot and click the blue OK button. Once you have successfully assigned a signature slot to its correct signer, the triangle in the top right corner will change color to match the square next to the assigned signer’s name. The form will automatically include extra signature slots. If you have extra signature slots, right click on them select “delete.”

8. Repeat this process in the second and third sections, then select the blue “Sign, then Send” button.
9. The next page is where you fill in the rest of the relevant blanks in the sections. Make sure to add the printed names of all parties and sign in the student signature slot. You do this by clicking on the student signature section.
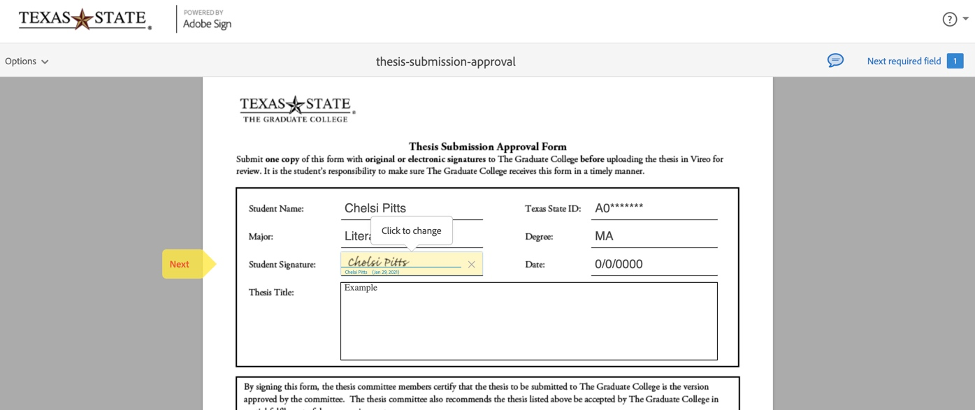


10. When all required fields have been satisfied, a blue “Click to Sign” button will appear at the bottom of the document. Click it, and it will complete the document and send it to the next signer.
